LILY THOMSON DESIGNS
Millinery Level 2
A Collection of felt hats inspired by Hieronymus Bosch


KCC, millinery Level 2: much like level one we were told to choose any theme to inspire our project designs, this time for a collection of seven hats. I chose to base my collection on a painting by my favourite Northern Renaissance painter, Hieronymus Bosch, the 'Garden of Earthly Delights'. It's a target rich environment when looking for inspiration because of the high level of detail.


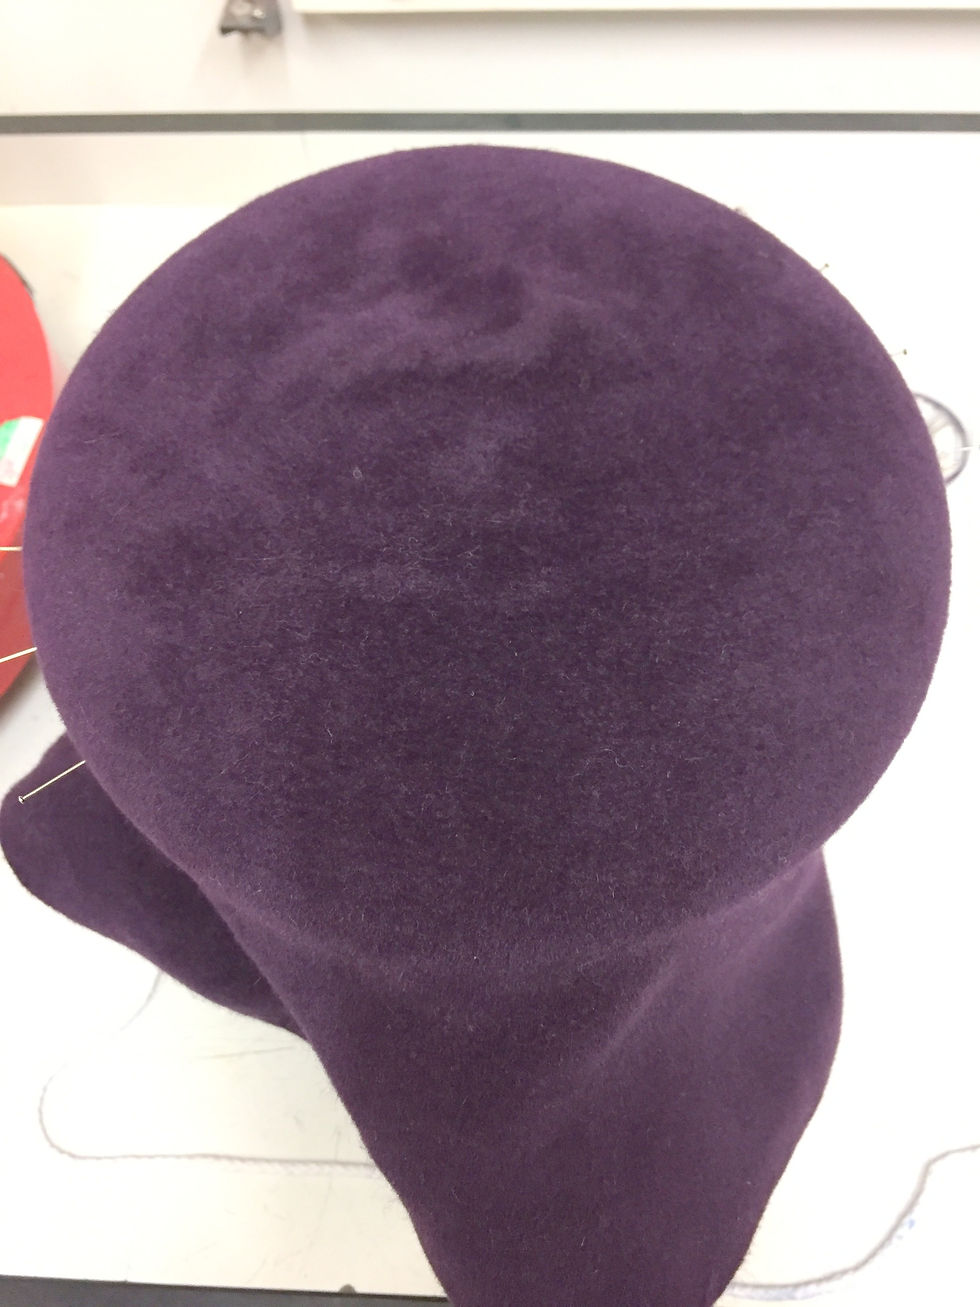
Block the crown in a nice velour felt (they have the nicest shade of green)

Dip dye the base of a purple felt cone in different shades of blue to make the brim piece

Stiffen the brim felt and stretch it over the same block used to shape the crown, steam the brim into a cloche shape

Cut the crown and brim felts down to shape, pin and machine sew them together

Sew down the petersham ribbon (clockwise) and steam it flat

Dip dye an ordinary grey felt to match the brim and block it over the top of a small hat stand to make a decorative piece

Create a mock up of the decorative pieces (unusual shapes that reflect Bosch's painting)

Take the offcuts of the grey felt and dip dye it in an orange-brown combination of fabric dye to compliment the blue

Cut away the shapes of the mocked up additions, machine sew down their centre for symmetry, stab stitch over the crown / brim join

With a simple turned down brim the hat was looking a bit dowdy so I trimmed it into points, cut and stitched up one side to counterbalance the flower addition and make it more fun

Stitch down the felt blocked on hat stand (with the edges folded under) - it looked too much like a button so I stitched down the centre with beads to make it look floral

The individual pieces of the hat didn't seem to tie in together yet so I gilded the edges and centre of the decorative pieces to complete the composition (gold leaf and PVA)

I think the gilding works well with the altarpiece theme and helps make the hat more unified


Steam a felt cone as closely as possible around a wooden curtain knob (leave on the steamer for a while beforehand)

Mark out the centre point and clockface sides of the sphere (do not remove from the block)

Mark out 16 equal sides of the sphere using 8 lengths of white thread

Mark out another 16 lines in black thread, alternating with the white

It was too difficult to mark out the points where the studs would go with fabric pen, I changed to different colours of knotted thread

Because each row of studs is different in size, I marked the points where they should go in different coloured thread to keep them visually separate

Remove from the wooden block, slide the vertical threads away (leaving in the knotted threads), screw in the studs in increasing size order (guided by thread colour)

Decrease the size of the studs again towards the bottom - they were much heavier than expected so I put a Styrofoam ball in for support

use an off-cut of the felt to stitch a patch over the exposed base

keep the centre-point marked out so you know where to place the bow

Block a small crown (with two layers of buckram) on an ordinary crown block, wire it with soft wire so you can adjust it

Cut a strip of silk on the bias, sew the ends to make a tube, slip the buckram base inside it

Fold over the edge of the silk (over the underside of the crown) and gather it with a running stitch so it's 2cm over the edge, Slip a cotton lining into it

Do the same on the other side, fold the silk over so that it doesn't quite cover the centre - this gives the strawberry a stable sitting place

Cut a strip of the same silk on the bias, cover a shop bought headband with it (petersham covering the raw edge in the centre)

15cm wide, 0.5m long netting, gathered around top and at the back to make a birdcage shape, stitch to buckram base, stitch strawberry onto base

plastic millinery comb, copydex glue petersham over the edge, hold in place with clothes pegs

stitch the gathered edge of the silk onto the cotton lining (with a hidden stitch), stitch the comb onto the headband (by petersham)

Mock up the bow with paper - imitate the Bosch detail as closely as possible

Dye pieces of cotton gauze green (with Dylon dye), make a variety of shades by leaving them in for different lengths of time

Iron the pieces out, stencil on the shapes of the bow using mock up paper pieces

Rolling the edges of the gauze didn't hold the shape of the bows securely enough so I stitched them into place

Pin and stitch the pieces of the bow (6 in total) together

Put dots of glue in the corners of the top piece to stop it from fraying apart


Find two of the same velour capelines, stretch them out so they can be draped over a shallow wide brim block

Start draping the felt into a Rose shape, working out from the centre

Gather as many petal shapes as possible until the felt just covers the block (I managed to hide a tear in the felt by folding it over)

Smooth down the remaining felt around the base to make closed petal shapes, trim down the excess felt on one of the roses evenly

The roses should be the same size and shape, steam the edges of the second rose into curves to reflect the petal shapes

make a millinery wire structure in both roses (most importantly to keep shape around the centre and edges)

Make a small crown (two layers of buckram) on an ordinary crown block, stitch into the centre of the rose that will form the base of the hat - to keep it stable when stitched to the headband

Stitch together the two rose shapes at the edges (where they're wired)

Use the excess felt on the base rose (that has been shaped to reflect the petals) to cover the join between the two pieces, stitch down with hidden stitches

make a strong Alice band using millinery wire and a bar piece in the centre

Shape it around a crown block, stitch two layers of buckram over it (shaped on the same block) and then cover it in silk that has been cut on the bias

Stitch a millinery comb onto the underside of the Alice band (where the rose sits)


Stretch a white wool felt over a beret block (this needed a lot of steaming)
Shape a purple velour felt over the same block (I was going to use dark blue but this wasn't exotic enough)

Mark the centre of the purple velour with a pin and then mark the section to be cut away using thread (to create the straightest line)

Stiffen the edges of the felt that has had a piece cut away and sculpt into a pomegranate-esque shape (the furry patch is an exploration of texture)

Mark out the area of the white beret that is visible from under the purple beret, bead it densely, add a second layer with pointy red beads

Cover the white beret with the purple, wire the purple beret (in a complete circle, it should be stitched to the white felt in the gap)

Pin the white beret edges to the purple edges

Iron the petersham into a curve so it can be stitched over the wire without wrinkles

Tack the petersham over the edges of the purple and white berets, stitch it down (through the loops)

Use a piece of off-cut felt to make the centre tip of the hat

Glue petersham over a large millinery comb, stitch it to the back of the inside of the hat (to counterbalance the weight of the beaded side)


Stretch a velour felt over a block that has been built up using cellophane and tin foil

The spirals of the hat needed smoothing out under steam because of the rough block's texture

Wire the edge - The folded drape was supposed to look a bit different but this shape worked well while blocking

Iron some petersham into a curve so it can follow the shape of the edge of the hat

Stitch petersham over the wire, tack down the exposed bit of the wire to the felt

Stitch long feathers into the creases of the felt - requires care because they're quite brittle

Add spotty feathers to fill it up with colour


Dip dye a a wool felt in fabric dye to make the edges slightly more purple

Steam and block - It's a small block so it can be worn at an angle but doesn't require any clips

Stiffen and pin down the edges to prepare it for wiring

Cut six equal circles of cotton gauze and fold into quarters to make the petals for each flower

Stitch up the sides of the petals and then stitch together an the top and bottom to make a flower (the beads help fill it out)

Machine sew down the edge of the felt and fold it under, slip soft millinery wire though the stitched edge

Make flowers of varying sizes, pin them down to plan where they will go, make a slit at the side of the crown and shape it with steam

Stitch an off-cut of light blue felt on the inside of the hat, over the slit - shape it so it's visible from the other side

Stitch down the flowers

Make sure the blue felt hasn't forced the slit to go flat, keep it curved


Dip dye a grey felt in a blend of browns, pinks and oranges

Gradually submerge the felt in the dye in different stages & add different fabric dyes so you get rings of different shades

Block a blue felt

Leave the felt to dry and stiffen (with Chemical stiffener)

Originally I had intended to make a leaf motif but when I folded the felt inside out a friend pointed out it looked much more pebble-like

drape the felt (on the same block used to make the blue hat) to make ridges and curves like a seashell

Trim down the front of the felt and curl under to make a shell-like edge

Wire the edge of the blue hat (using soft millinery wire so the hat can sit more like a beret)

Pin the clam shell felt over the blue as closely as possible and then sew the back down onto the wire edge too

Stab stitch the clam shell over the blue (so that it fits as snugly as possible)

Bead in naturalistic colours (that reflect the colours of the felt) to enhance the circular ridges

The beads help keep the outer felt in shape and makes it look a bit more organic
The Complete Collection
